Add, Edit or Deactivate Rooms
- 05 Apr 2024
- 2 Minutes to read
- Print
Add, Edit or Deactivate Rooms
- Updated on 05 Apr 2024
- 2 Minutes to read
- Print
Article Summary
Share feedback
Thanks for sharing your feedback!
Add, edit, or deactivate rooms from the website.
Create rooms to organize groups of students and track their movement throughout the day. There are many ways you can organize or name rooms. Examples include rooms based on grade, age, activities, by teacher, or physical classroom names.
Navigating the All Rooms Screen
- Capacity: maximum number of students the room holds and can be set on the room profile.
- Assigned Students: the number of students assigned to each room. Clicking the number of students directs you to the My School | Students screen and displays only students assigned to the selected room.
- Current Checked-In Students: total number of students currently signed into each room. Clicking the number of children directs you to the Student Sign-In | Attendance screen.
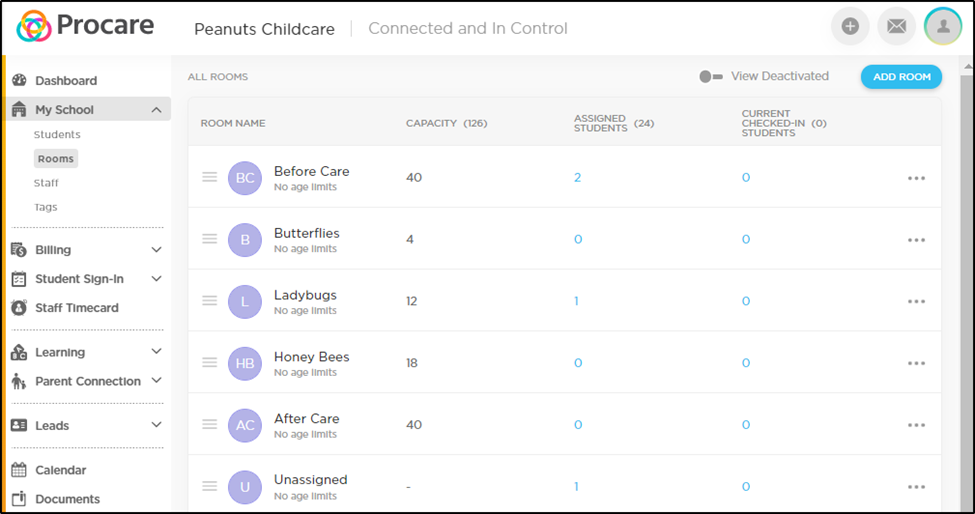

To reorder the room list, click the icon to the left of the room name allowing you to drag and drop to the appropriate order.

Use the More Actions icon in the right column to view the room profile (see below for details) or deactivate the room.

To view deactivated rooms, toggle the View Deactivated field on (toggle is blue when viewing deactivated rooms).

Room Profiles
Profile: the Profile tabs allows you to view and edit the room name, room status, capacity, and age range.
Please Note: room status cannot be deactivated if students are currently assigned to the room. This is indicated with a lock icon.
Students: students assigned to the selected classroom display with their schedule. Add more students to the room or use the More Actions icon to view the student's profile or reassign them to a different room.

Staff: the staff tab allows you to view staff members assigned to the selected room, add additional staff, or use the More Actions icon to view the staff profile or assign them to a different room.

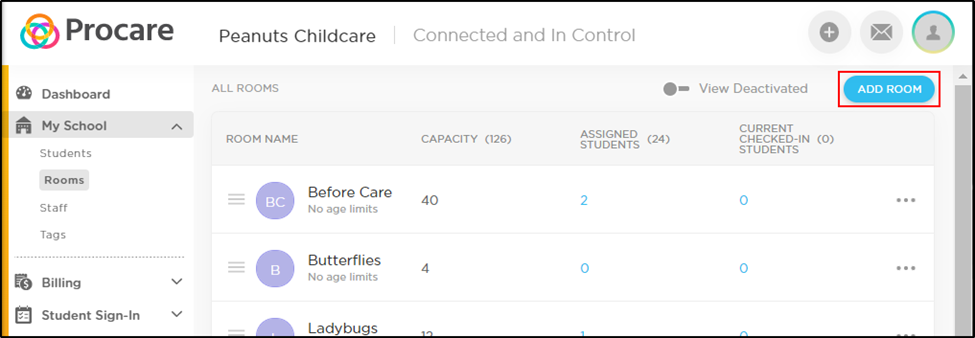
Creating a Room From the Web
Navigate to My School > Rooms. To add a room, click Add Room or click the room name to edit the room details.
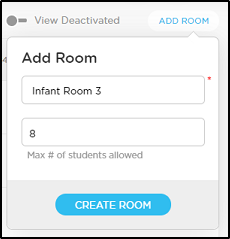
Complete the pop-up, then click Create Room.
Please Note: The room name is required, but capacity is optional. Capacity displays on the Live Room Status table on the Dashboard.
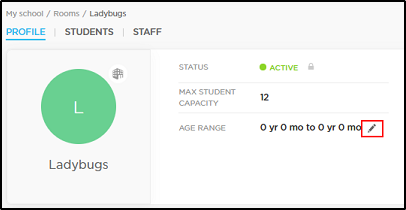
To add additional information on the room, click the room name from the rooms list or click the More Actions icon, then View Profile.

To edit the room name, capacity, or age range, place your mouse over the field and click the pencil icon.
Please Note: A lock icon next to the room status means there are active students currently assigned to the room.


Was this article helpful?